Tässä osiossa näkyy mitä ideasta sitten syntyi.
Ohjeita mittareiden operoinnissa:
- http://personal.linkline.com/dbarton/740BoostGaugeInstall/ ahtopaine mittari
- Kello on helpoin tapaus, sillä viisarit lähtevät nostamalla pois helposti ja mittaritaustan saa siten pois.
- Lopuissa tapauksissa viisarin keskiön suoja tulee nostaa pois. Tämän jälkeen veitsellä nostaa mittaritaustaa sen verran, että tarrat irtoavat. Mittaritaustat saa tämän jälkeen ujutettua viisarin yli pois.
Originally I planned on making a custom gauge cluster using AutoGauge products. This idea lived and evolved for some time until I saw a picture of a stock gauge cluster of a 240 with white gauge faces. So next I decided to use the stock gauge cluster and change the faces to white ones. After this I saw a picture of a 740 turbo gauge cluster and I just had to have one!
This section shows what came of the final idea.
Notes on removing the gauge faces:
- http://personal.linkline.com/dbarton/740BoostGaugeInstall/ boost gauge
- The clock is the easiest to operate on since the needles can simply be lifted away and the gauge face then removed.
- On rest of the gauges the needle hub needs to be removed. After this use a knife to lift the gauge face just enough to release the stickers underneath. The gauge faces can then be slipped around the needle.
- 240 -mittarit / gauges
- 740 -mittarit / gauges
- Mittaristotaulun sapluuna / Gauge cluster back plate stencil 1
- Mittaristotaulun sapluuna / Gauge cluster back plate stencil 2
- Mittaristotaulun sapluuna / Gauge cluster back plate stencil 3
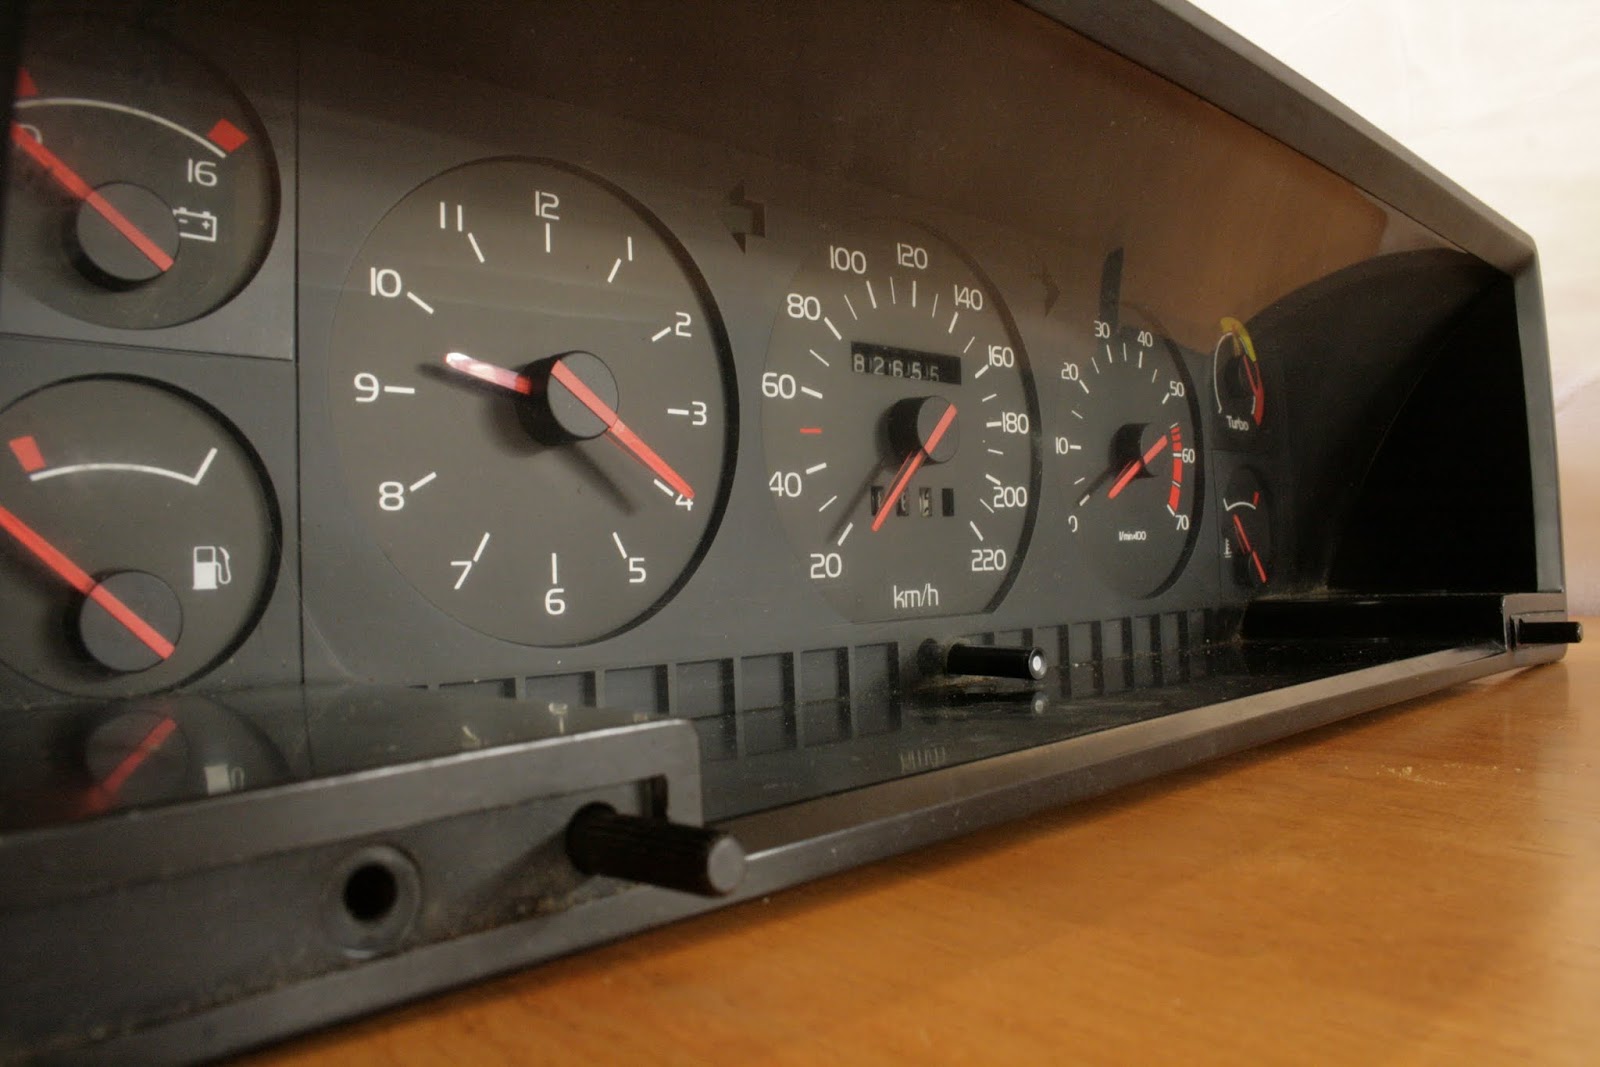
Volvo 740 Turbo mittaristo alkuperäisessä kunnossa.
Volvo 740 Turbo gauge cluster in stock condition.

Alkuperäiset mittaritaustat skannattuna. Volttimittari oli ongelma, rajoitin neulan vuoksi.
Sitten käänteiset värit ja testi tulostus tavalliselle A4 -paperille.
Stock gauge faces scanned. The volt meter was a problem due to the limitter needle.
Then inverted colors and a test print on a normal A4 -paper.


Kokeilin leikata ja asetella uuden taustan paperista ensin.
I tried a paper version first and test fitted it.


Paperisten kokeilujen jälkeen ja lopullisten shoppausten päätteeksi mittaritaustat tulostin A4 kokoiselle tarrapaperille. Ahtopaineen mittariin lisätty -0,5bar +0,5bar ja +1bar merkit.
After testing with paper and finalizing photoshopped face's I printed them using a A4 sticker sheet. Added -0,5bar +0,5bar and +1bar, marks on the boost gauge.


Vertailun vuoksi alkuperäiset taustat ja lopulliset taustat tulostettuna tarrapaperille.
For comparison the stock face's with the final face's printed on a sticker sheet.


Tämän jälkeen leikkasin taustat irti ja liimasin alkuperäisten taustojen päälle ja kasasin mittariston.
Then I cut the face's out and installed them on the stock face's and re-assembled the gauge cluster.

Saman operaation tein myös 200-sarjan mittaristolle.
I did the same operation on the stock 200-series gauge cluster.

200-sarjalaisen mittaristo- ja keskituuletinkehikko on kiinni kahdella klipsillä, yksi kummassakin yläkulmassa. Samoin kiinni pitää kaksi torx -ruuvia tuuletusaukkojen vierressä lisämittarien kohdilla.
200-series gauge cluster and air vent frame is held with two retainers, one in each upper corner.
It is also held with two torx screws next to the air vents where the optional gauges are.


Ruuvien vastakierteet näkyy tässä kuvassa hyvin. Alempi piti leikata pois, jotta mittaristo mahtui paikalleen.
The threads for the screws can be easily seen here. The lower one had to be cut away to make clearance for the gauge cluster.


700 -sarjan mittariston muodot ovat hyvin samat kuin 200 -sarjalaisessa.
The 700 -series gauge cluster has pretty much the same shape as the 200 -series gauge cluster.

Pahvista tehty päätysapluuna, mikä oli työläs saada sopivaksi.
An end of a stencil cut out of cardboard. It was pain in the butt to get the shape right.

Mittariston kehystä ei voinut käyttää apuna päätyjen teossa, koska se oli erimuotoinen, kuin itse upotus.
The frame of the gauge cluster could not be used to make the ends of the stencil because the hole in the dash had a different shape.

Mutta sitä pystyi käyttämään muuten erinomaisesti apuna.
But it was of good use otherwise when making the stencil.


Toleransseissa
In tolerances.


Samaisesta sapluunasta tehty metallinen versio.
A metal version of the used stencil.


